In this tip you will learn what you need to know about aged trial balance, aged trial balance with options, aged historical trial balance, reconcile to GL for AP, and printing a month-end check register.
Accounts Payable Month End Process Checklist
- Aged Trial Balance
Purchasing Reports>>Aged Trial Balances
(This is the report your auditors will want where nothing is excluded)
Normally only used for auditors.
- Aged Trial Balance with Options
Purchasing>>Reports>>Aged Trial Balance with Options
- Aged Historical Trial Balance with Options
Purchasing>>Reports>>Aged Historical Trial Balance with Options
- Reconcile to GL
Financials>>Routines>>Reconcile to GL
- Check Register Print out of all Checks for month
Purchasing>>Reports>>Check Information>>Checks by Vendor by Mon
1. Aged Trial Balance
Purchasing>>Reports>.Aged Trial Balance
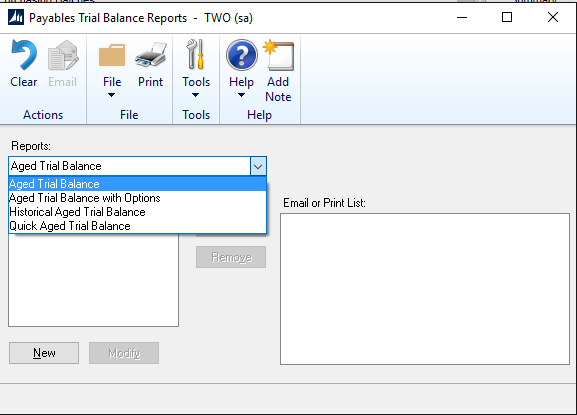
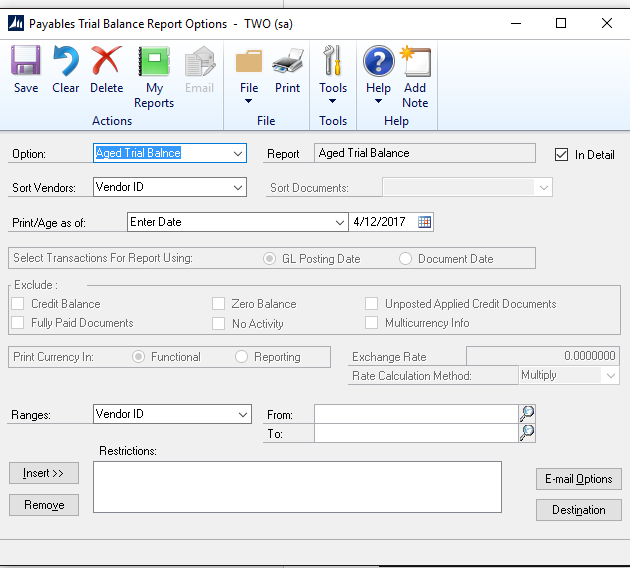
When you print this report you have no options, it is going to go by the GL date and will include all vendors that you have in your system whether they are a zero balance or have had any activity or not.
This is normally only used for your auditor for year-end.
2. Aged Trial Balance with Options
Go to Purchasing>>Reports>>Aged Trial Balance with Options
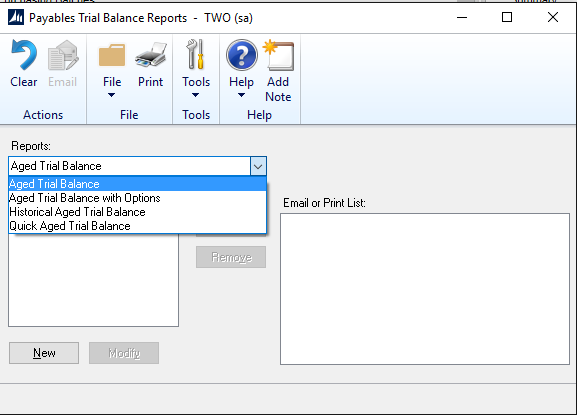
Then go to New
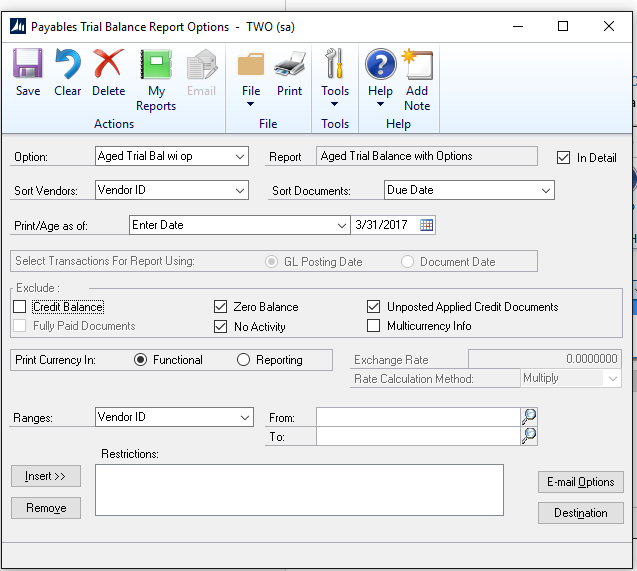
Put in a name for the option
You want to Print/Age as of the end of the month (for reconciling to your GL balance for A/P)
Exclude:
- Zero Balance
- No Activity
- Unposted Applied credit Documents (these are not posted, won’t be part of your GL)
- Multicurrency Info
If you leave the range blank will bring up all vendors and can be printed.
3. Historical Aged Historical Trial Balance
Purchasing>>Reports>>Historical Aged Trial Balance
This report can be printed at any time and give you exactly were A/P stood at the end of the month before checks or credits were being applied and issued in the system.
You do not have to remember on the first of the month to run in and print the Aged Trial Balance with Options to reconcile. If you forget and it is the 3rd or 4th of the month you can print this report and it will show you exactly where you stood at the end of the month.
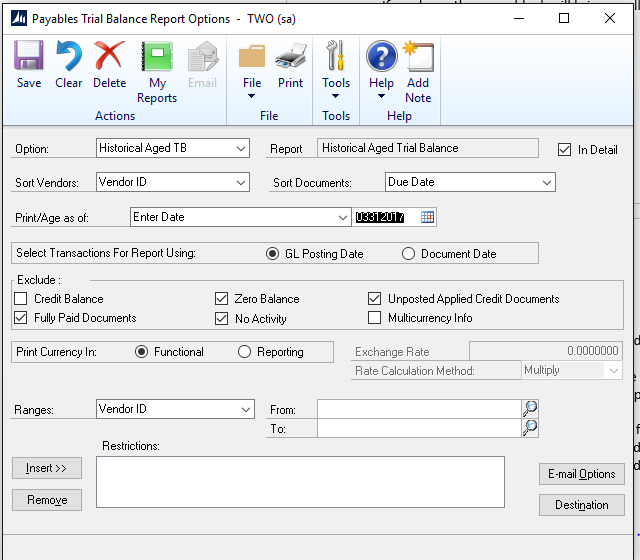
This report can be printed in summary or detail by changed the checkbox in red above.
You can print this report for one vendor or all. By using the range and inserting into the restrictions.
This is like the Aged Trial Balance with Options for excluding detail.
4. Reconcile to GL for A/P
Financial: Routines>>Reconcile to GL
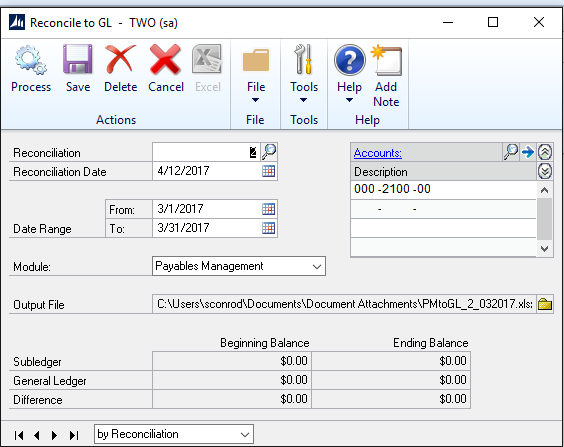
- Next Reconciliation Number comes up automatically
- Put in the date to reconcile (end of the month)
- Put in a Date Range for the reconciliation (Beg of month to end of month)
- Make sure to mark Module: Payables Management
- In accounts enter in your A/P account
- Enter in the Output file (this will save the excel file that is produced for you)
Process Report:
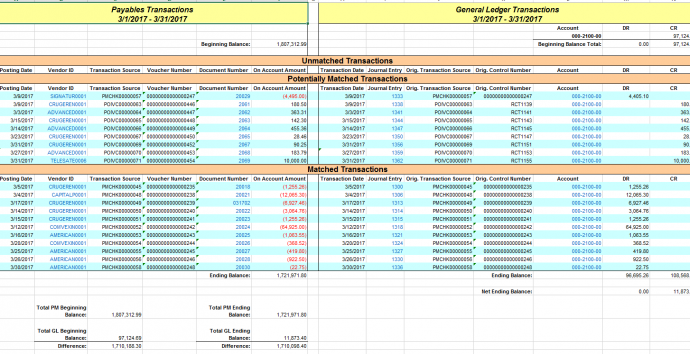
Report will show all the GL detail on the right and the payables transaction on the left as well as the beginning balances in the GL and A/P
This is doing all the matching for you and will show you potential areas where your A/P to GL account is off.
5. Printing a Month End Check Register
Reports>>Purchasing>>Check Information>>Vendor Check Register
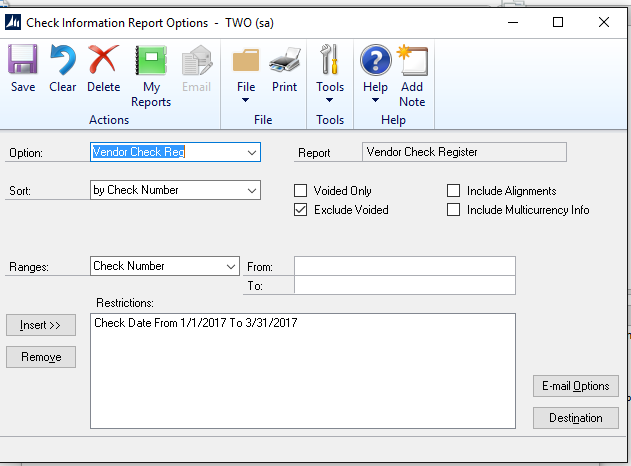
Name the Option
Use the Dropdown Range to enter your date range.
You can exclude or include voids.
Print Register:
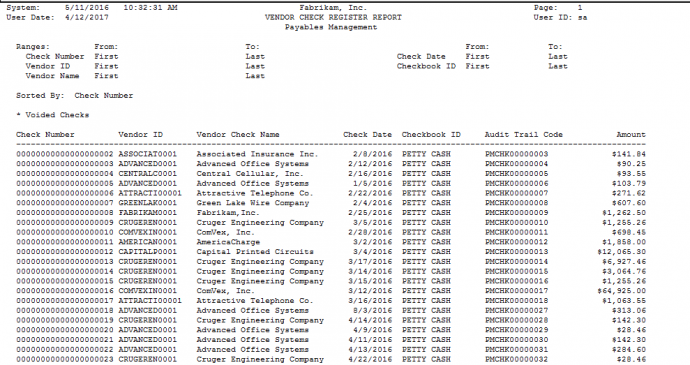
Will show every check Vendor ID, Vendor Name date, and the amount.
If you are interested in Dynamics GP training or support contact 860-485-0910 x4 or sales@calszone.com
Get more Dynamics GP Tips and Tricks www.calszone.com/tips
By Susan M. Conrod, Senior Implementation Consultant, CAL Business Solutions, www.calszone.com


