This tip will cover what you need to know about Dynamics GP Month End for printing the trial balance, historical aged trial balance, aging accounts receivable, paid transaction removed, analysis reports, reconciling A/R, finance changes, waiving finance charges, statements, and write off documents.
Accounts Receivable Month End Process Checklist
- Printing the Aged Trial Balance with Options
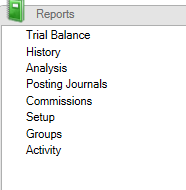
Sales>>Reports>>Trial Balance
- Printing the Historical Aged Trail Balance
Sales>>Reports>>Trail Balances
- Aging Accounts
Sales>>Routines>>Aging
- Paid Transaction Removal
Sales>>Routines>>Paid Trx Removal
- Analysis Reports.
Sales>>Reports>>Analysis
- Reconcile A/R
Financial>>Reconcile to GL
- Finance Charges
Sales>>Routines>>Finance Charges
- Waiving NSF fees and Finance Charges
Sales>>Transactions>>Posted Transaction Maintenance
- Statements
Sales>>Routines>>Statements
- Write Off Documents
Sales>>Routines>.Write off Documents.
1. Printing the Trial Balance:
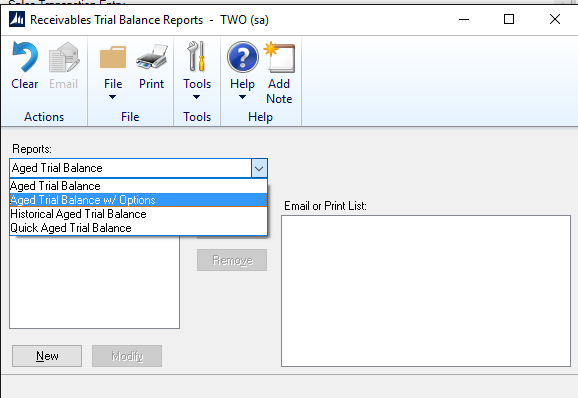
Go to Sales>>Reports>>Trial Balance
Use the drop down
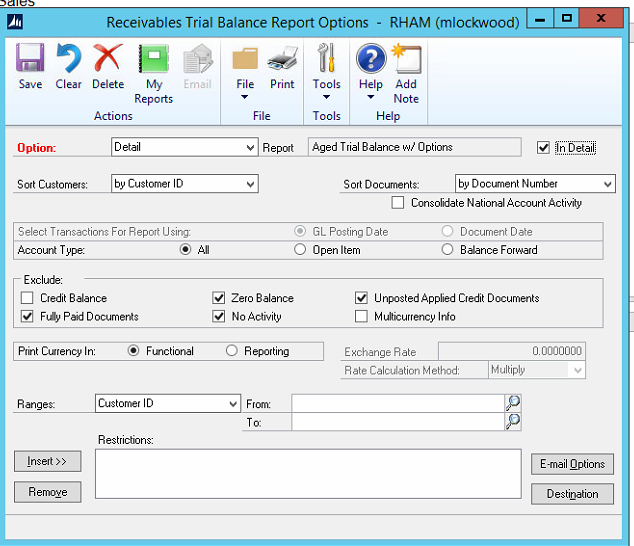
Go to the Aged Trail Balance W/ Options
(See Below)
This report can be used in Detail or Summary (see checkbox)
Exclude:
- Fully Paid (documents in the month that are fully paid)
- Zero Balances (customer who has no balance)
- No Activity (customers with no Activity)
- Unposted Applied Credit Documents (You are doing a GL reconcile, you would not want Unposted Credit Docs)
Go to the destination and send to screen or printer.
This will be your aging for the month.
2. Historical Aged Trial Balance
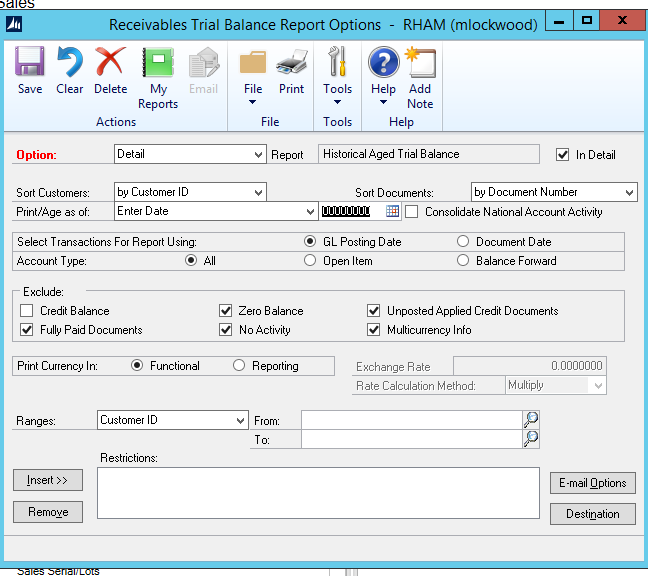
This trial balance can be done after the end of the month and gives you exactly what the Aging was as of the end of a month. There is no need to age backwards.
2 Important things to watch.
- Print/Age as of: This will allow you to go back to the date and age your file.
- GL Posting Date: You want this to be able to reconcile to the A/R account.
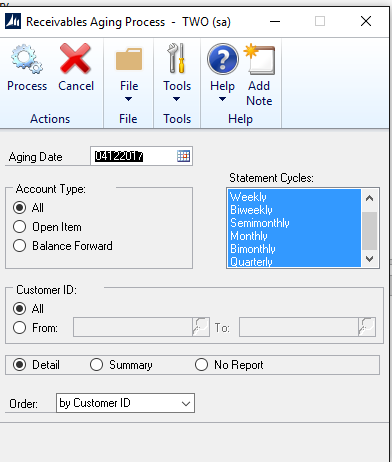
3. Aging Accounts Receivable
Unlike A/P which ages automatically, A/R is controlled by Accounting and is usually aged at month-end prior to printing statements. This way you can see how well you did from the beginning of the month to the end for collection.
To Age: Go to Sales>>Routines>>Aging
Enter in the date you want to age to.
Account type:
- All
- Open Item (when you have multiple aging buckets)
- Balance Forward (Utility companies use this where they have two buckets Open and Overdue.
You can age all customers or just one if needed.
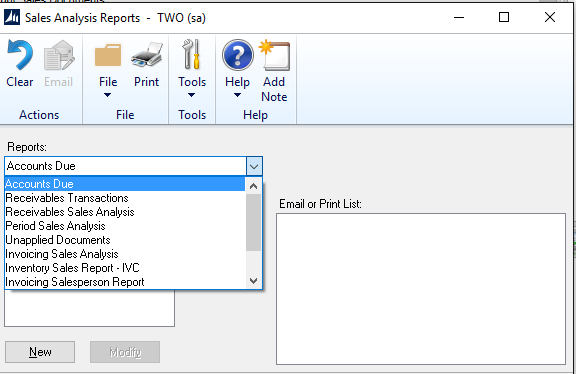
There is a report that can print called the Aged Trail Balance with no options (very first report in the drop down). But most people do not print this report because it gives you no options and gives you all customers.
What is recommended instead is to go back to your Aged Trial Balance with Options and print that report.
Statement Cycles: You can choose which Statement Cycle to age for.
This is a multi-select box (use CTRL and highlight in blue) if you want to use this option.
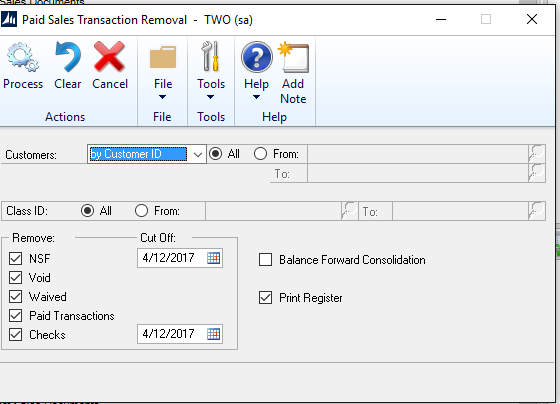
4. Paid Transaction Removal
Sales>>Routines>.Paid Transaction Removal
For A/R this will move Trx to history. (Unlike A/P which moves it automatically)
It is recommended that you do not move to history for 6 months out.
Once a Trx has been moved you cannot Unapply it in Sales and then re-apply.
You can choose what you want to remove:
NSF if you charged an NSF fee and then waived it you can go into the customer and move that to history so it will not show on their statement.
Voids: Went in and put a sales document on the wrong customer and voided and don’t want it to show on the wrong customer card.
Waived: For NSF’s that were waived and Finance Charges that were waived. Can move them to history so they won’t show on the statement.
Paid Transactions/Checks: Normally don’t move to history for at 6 months.
5. Analysis Reports
Reports>>Sales>>Analysis
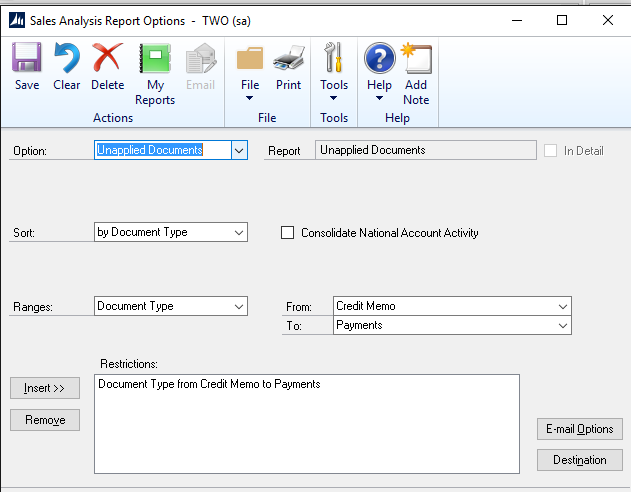
Unapplied Documents:
These are documents for which you have received a payment or have a credit memo that have not been applied. Usually cleaned up prior to printing statements.
The report produced lets you know what needs to be applied and cleaned up.
You would go to Apply Sales Documents to apply payments or Credits
Sales>>Transactions>>Apply Sales Documents (always watch your apply dates that will affect your aging.
6. Reconciling A/R
For coming up with why A/R won’t reconcile to the GL
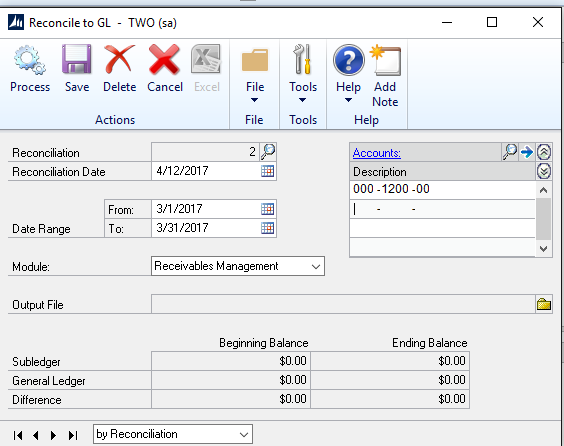
Go to Financial>>Routines>.Reconcile to GL
Put in the reconciliation Date: Usually the EOM
Go to the Module Receivables Management.
In Accounts, you can put in all of your A/R accounts
When you hit process it will go out and do a reconcile and show you all the GL Transactions that posted as well as the matching A/R transactions.
It will show you:
- Trx that do not match (could be a dating issue)
- Trx that possibly match
- Trx that have no match (did not post to GL) or were deleted in the sub ledger.
Takes less than 5 minutes to run.
7. Finance Charges:
Sales>>Routines>>Finance Charges
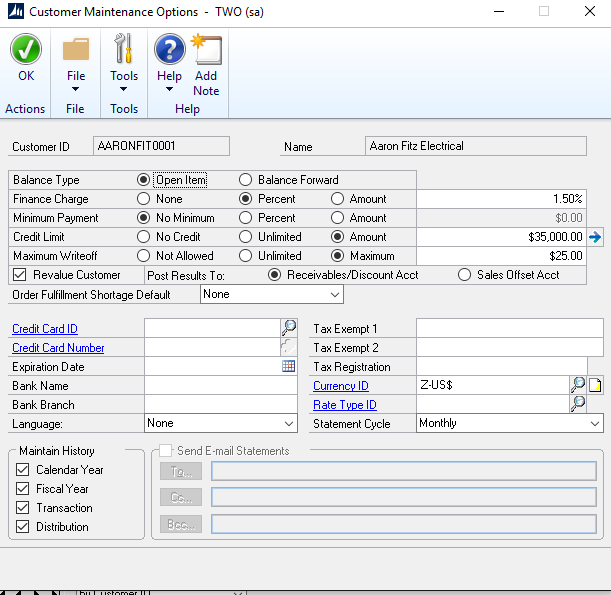
First Step: Customer must be setup with a Finance Charge:
Sales>>Cards>.Customer>>Options
Prior to running finance charge make sure customer is setup for a finance charge.
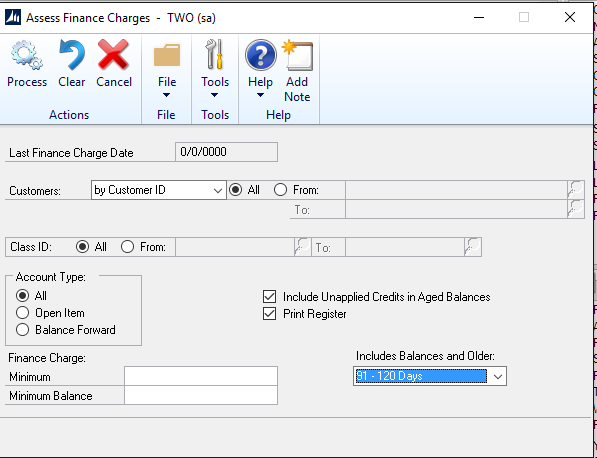
You can do finance charges on an individual customer.
Choose the customer. Include Balances and Older.
Choose: the overdue period and it will charge that and all overdues beyond that.
Please note: It will warn you if there are unapplied payments or Credits. And will print register with charges applied.
8. Waiving Finance Charges:
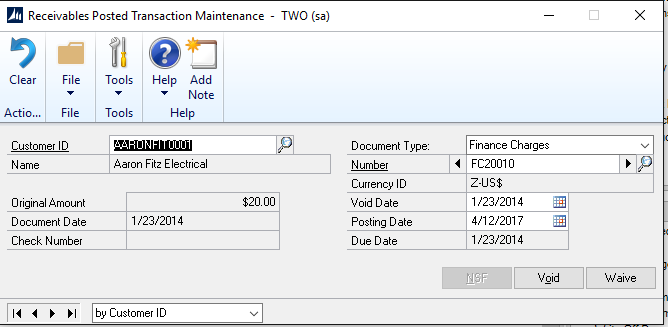
Sales>>Transactions>>Posted Transactions
- Bring up the customer
- Go to Document Type: Finance Charges
- Use the Lookup to find the Charge
- Watch your Void Date and Posting Dates
Waive the Finance Charges.
(To totally remove from statement go to Paid Transaction Removal on customer).
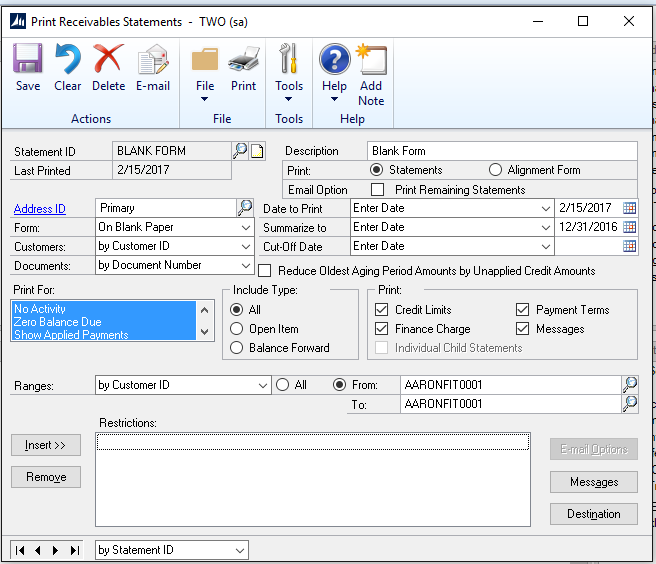
9. Statements:
Sales>>Routines>>Statements
When you go to print statements.
Use Blank Paper>>Templates which have been setup for your companies.
You have the ability to e-mail statements if e-mails have been setup for your customers.
Date to Print: Date that you want to print on the Statement (usually your Month End)
Summarize to: If they have outstanding transactions summarize will just have a Beginning balance.
Cutoff date: Usually your month end date.
You can print one statement or multiple.
Print For:
This is a multi-select box
- No Activity
- Zero Balance Due
- Show Applied payments
- Exclude Fully Applied
- Consolidated National Accounts
Once a statement has been produced you can also Re-print a previously printed statement by going to
Sales>>Routines>>Reprint Statements.
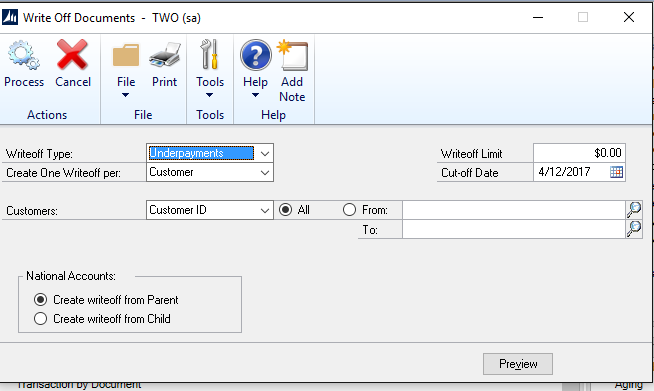
10. Write off Documents
This is for writing off underpayments and over-payments
Sales>>Routines>>Write off Documents
When you use this it will give you a preview of what is going to be written off
Use the PREVIEW at the bottom and you can uncheck anything you don’t want to be written off.
Can be done by the customer or give you a list of all customers.
If you are interested in Dynamics GP training or support contact 860-485-0910 x4 or sales@calszone.com
Get more Dynamics GP Tips and Tricks www.calszone.com/tips
By Susan M. Conrod, Senior Implementation Consultant, CAL Business Solutions, www.calszone.com

